
Quick Start
Get started with TradeSgnl quickly. This guide covers the essential steps to set up automated trading in just a few minutes.
Introduction
TradeSgnl turns TradingView alerts into live trades on a managed MT5 terminal. This guide walks you from a fresh account to your first executed signal.
Time required about 5 minutes end to end.
Before you start, you'll need two things:
- A paid TradeSgnl plan. Concurrent connections scale with tier (Starter: 1, Advanced: 3, Professional: 10). Open the portal to pick a plan.
- A TradingView plan that supports webhook alerts. Essential or higher is required. Free-trial users on a paid tier can send webhook alerts during the trial. Check TradingView plans.
Prefer to install MT5 yourself?
You can also run the EA in your own MetaTrader 5 install. Full manual setup (Windows requirements, file placement, DLL imports) lives on the EA Setup page.
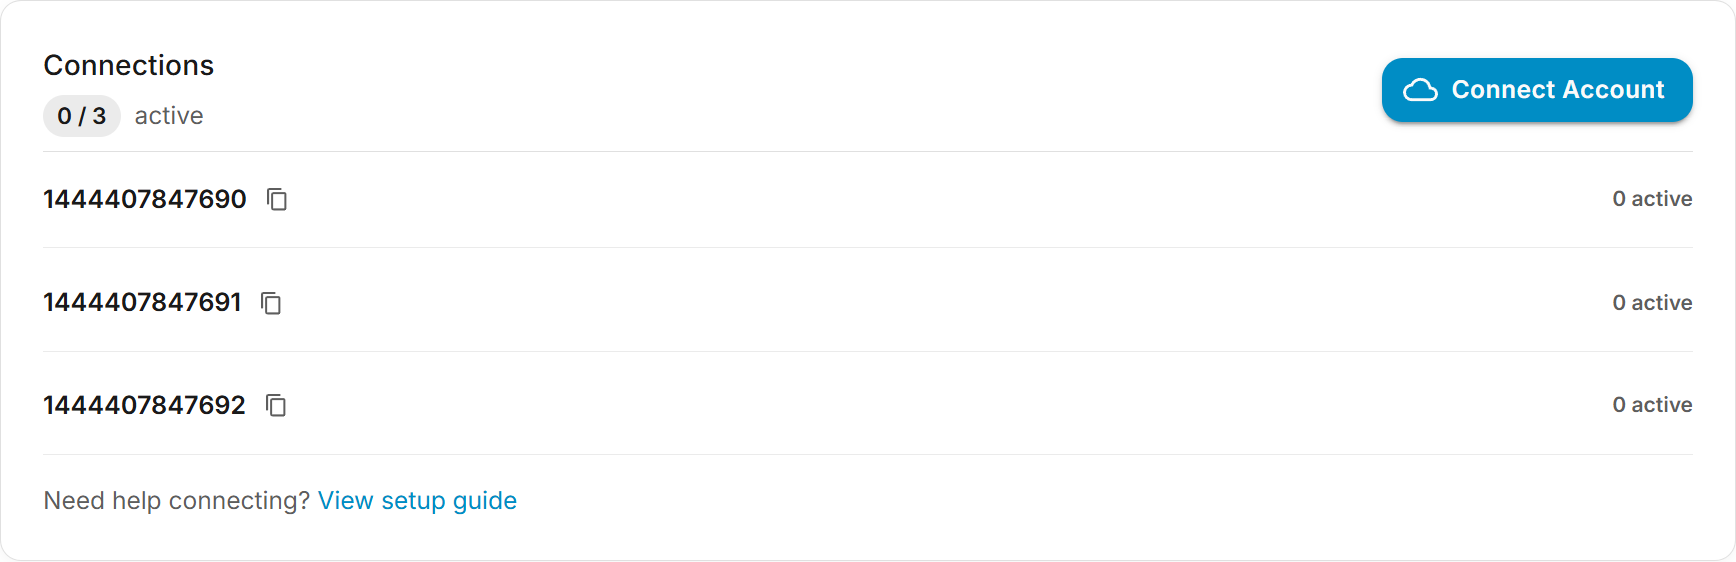
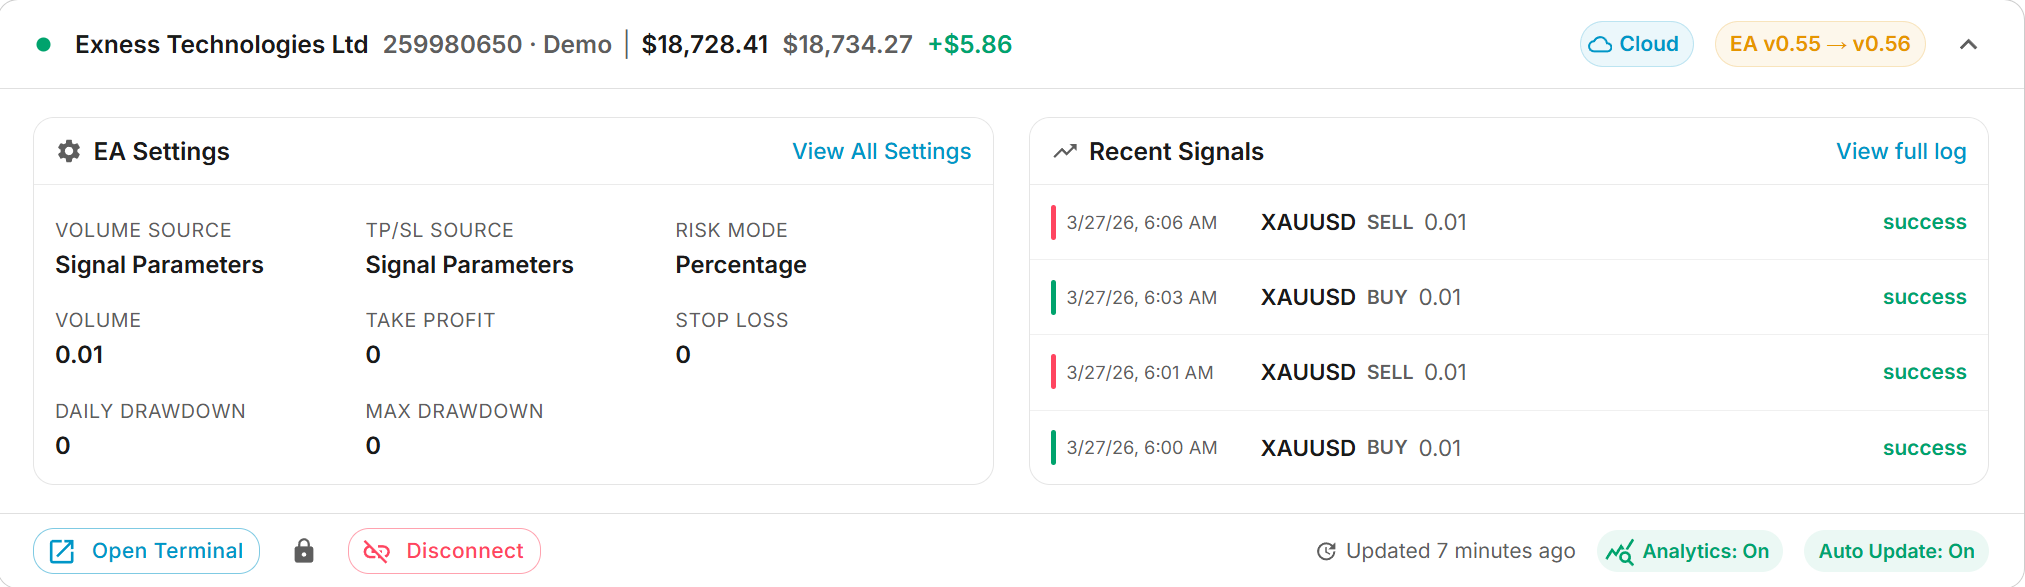
Connect Your account
A dedicated cloud terminal is provisioned for each account with the EA pre-installed and authenticated. No download, no DLL toggle, no chart configuration.
Open CloudConnect. In your portal Connections page click Connect Account to open the connection dialog.
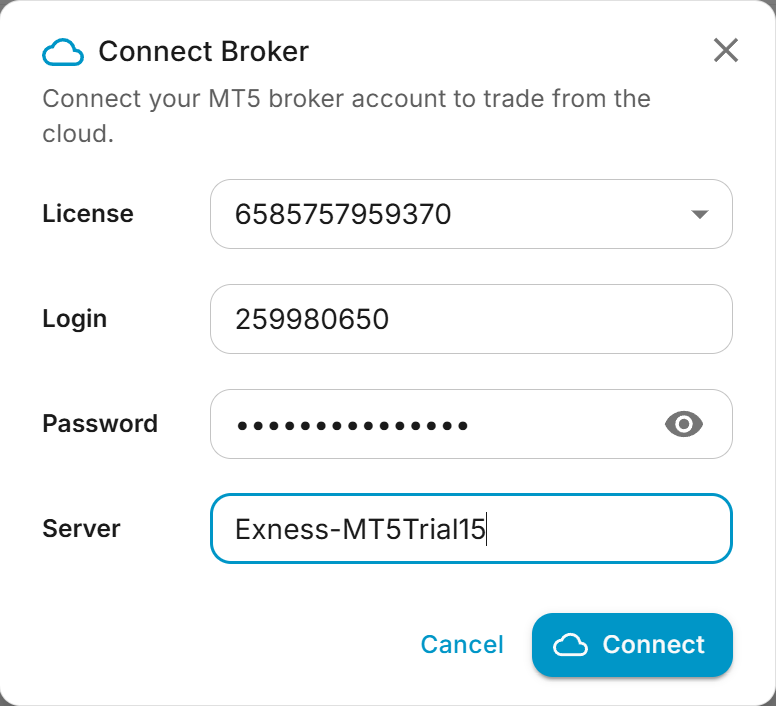
Enter broker credentials. Pick a license, then enter your MT5 login, password, and server (for example, ICMarkets-Demo03).
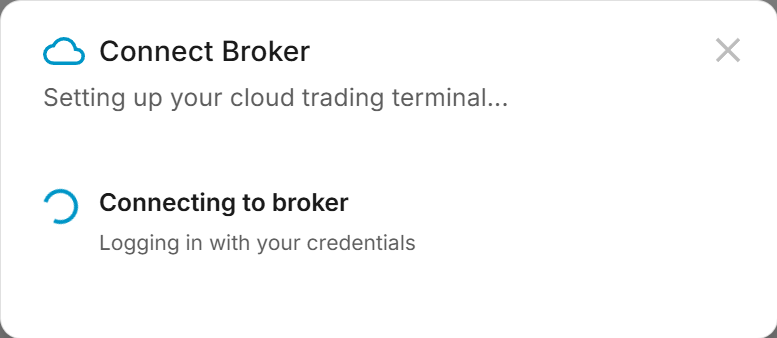
Verify the connection. Click Connect. The system locates your broker, signs in, and verifies the session. Provisioning usually finishes in under a minute.
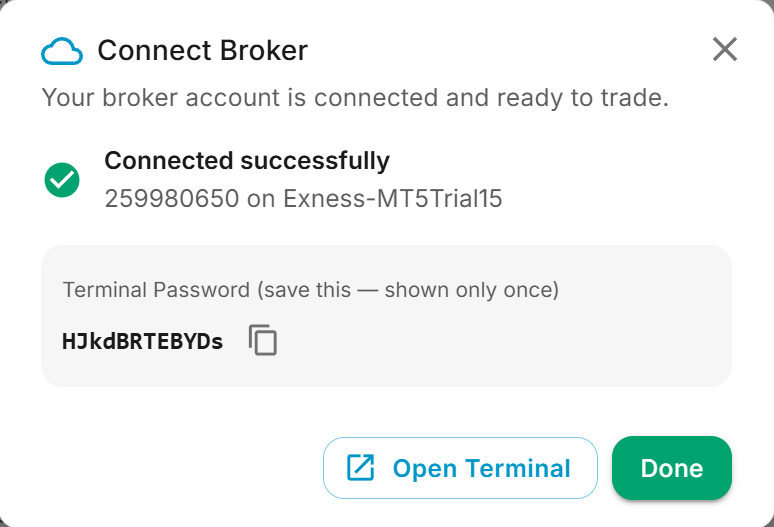
Shown only once
The terminal password is not stored and cannot be retrieved later. If you lose it, you can reset it from the terminal card.
Connected successfully. A healthy connection shows a Cloud chip in the card header, live balance and equity.
View the full CloudConnect guide
Send Test Signal
Before touching TradingView, confirm your EA and terminal can receive signals. The Syntax Generator in the portal has a one-click Test Signal button that bypasses TradingView entirely, so you can isolate any issues immediately.
Open the Syntax Generator. In the portal, open Tools → Syntax Generator.
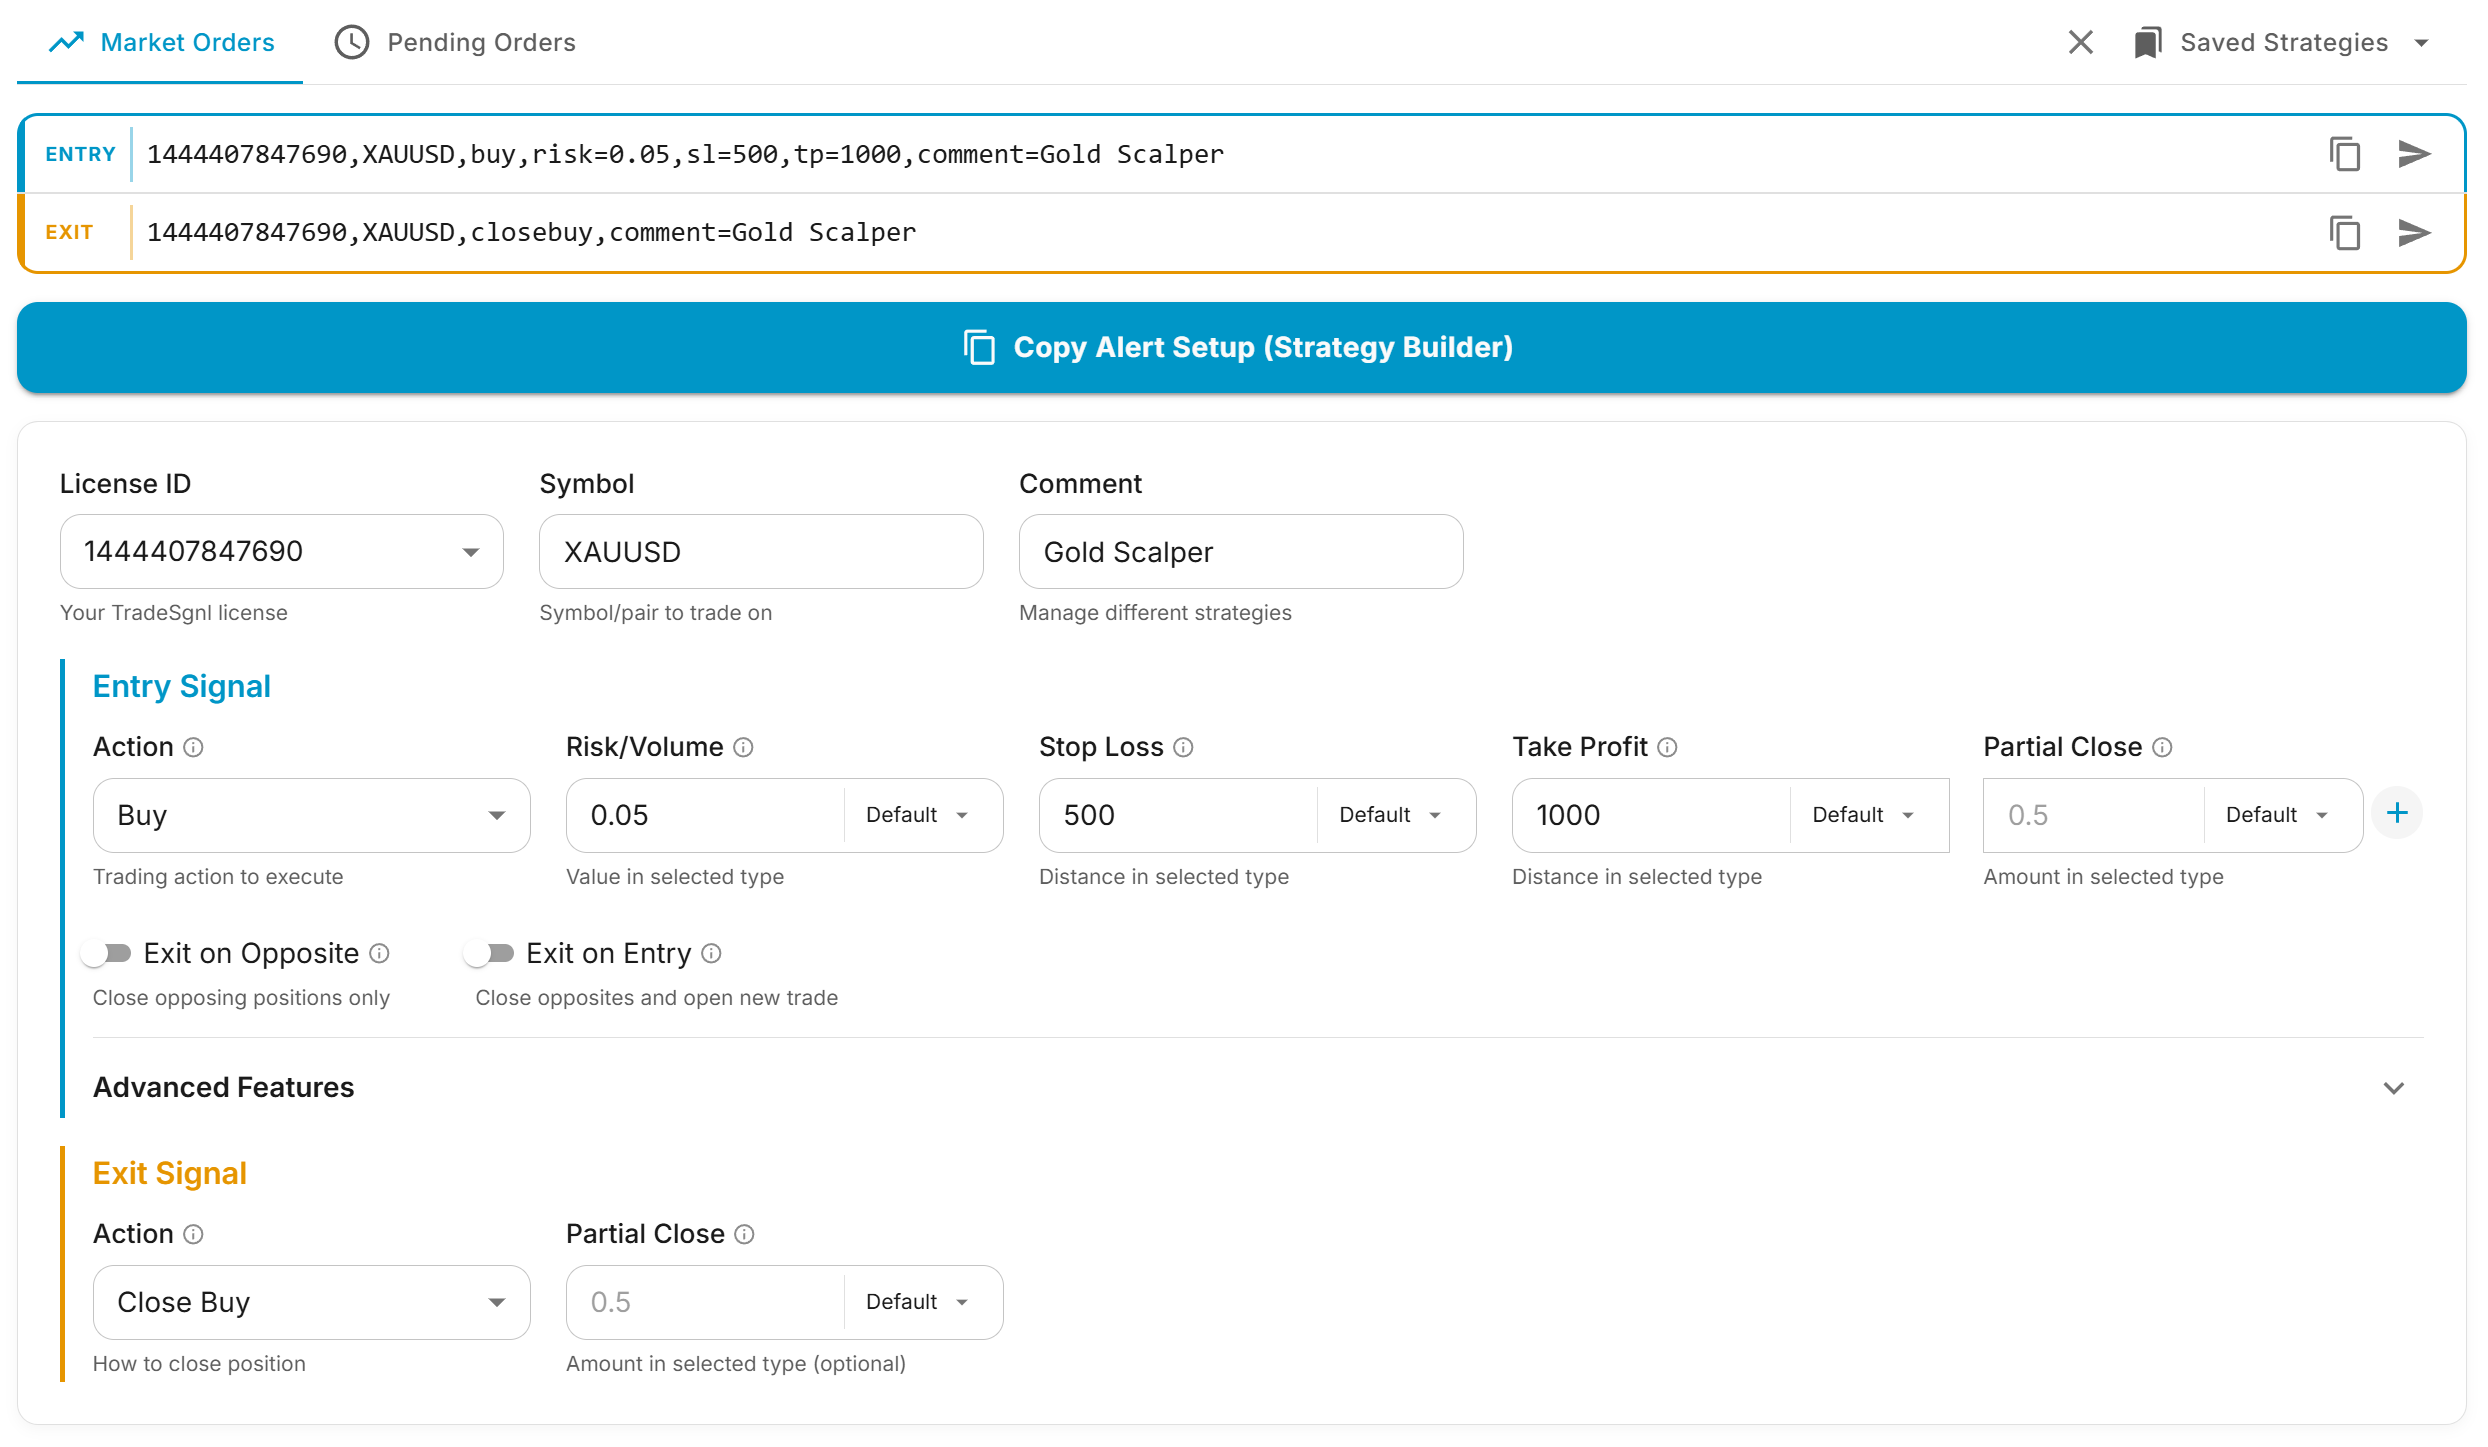
Open Syntax Generator
Fill the minimum fields. Pick your License, type a Symbol (BTCUSD is a safe default — tradable 24/7), choose Buy as the action, and set Risk to 0.01.
Click Test Signal. On the Entry preview box (blue border), click Test Signal. The portal sends the signal straight to your terminal.
Trade appeared in MT5?
Your EA, license, and terminal are all working. Close it manually from MT5 when you're done. Anything that fails after this point is on the TradingView side, not the TradeSgnl side.
Set Up Your First TradingView Alert
Once Test Signal works, replicate the same flow from a real TradingView alert. The Generator builds the message body; you only need to add the webhook URL in TradingView.
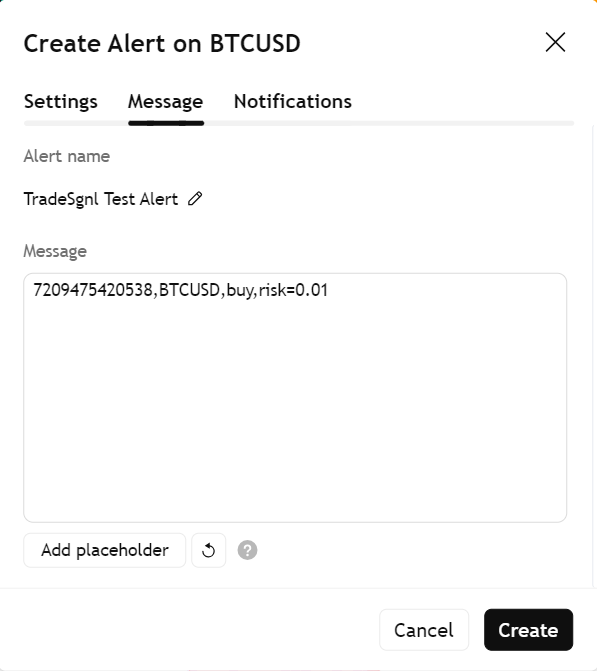
Generate your alert message. Back in the Syntax Generator, configure your real strategy (symbol, action, risk, optional SL/TP). Then click the Copy button on the Entry preview, or click Custom Strategy Message if you're attaching this to a Pine Script strategy.
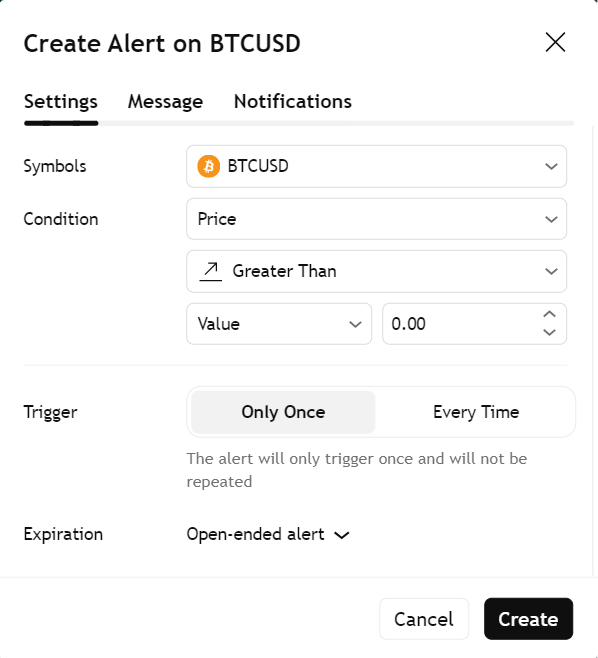
Create the alert in TradingView. Open any chart and create a new alert. Use your strategy's trigger conditions.
Paste the message. In the Message field, paste what you copied from the Syntax Generator.
Set the webhook URL. In the Notifications tab, enable Webhook URL and paste:
https://webhook.tradesgnl.com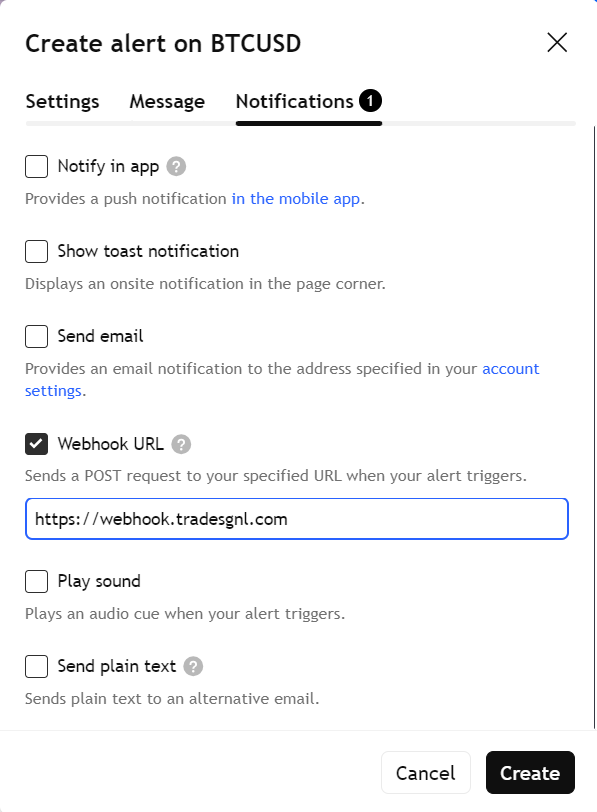
Start small
Use a tiny risk value (risk=0.01) for your first live alert. Once you've confirmed it executes, scale up.
Next Steps
Now that the basics are wired up, explore what else TradeSgnl can do: